Getting Started with Tracker Based AR
Tracker-based AR in Unity : Using Vuforia
This will kick off the Augmented Reality Tutorial Series, with a quick and easy guide to getting Augmented Reality working in Unity, using the now built in Vuforia.
Prerequisites:
- Unity 2017.2
- A Vuforia Account
- An AR capable device ( A laptop + webcam will do!)
Quick Overview
1. Start a new project
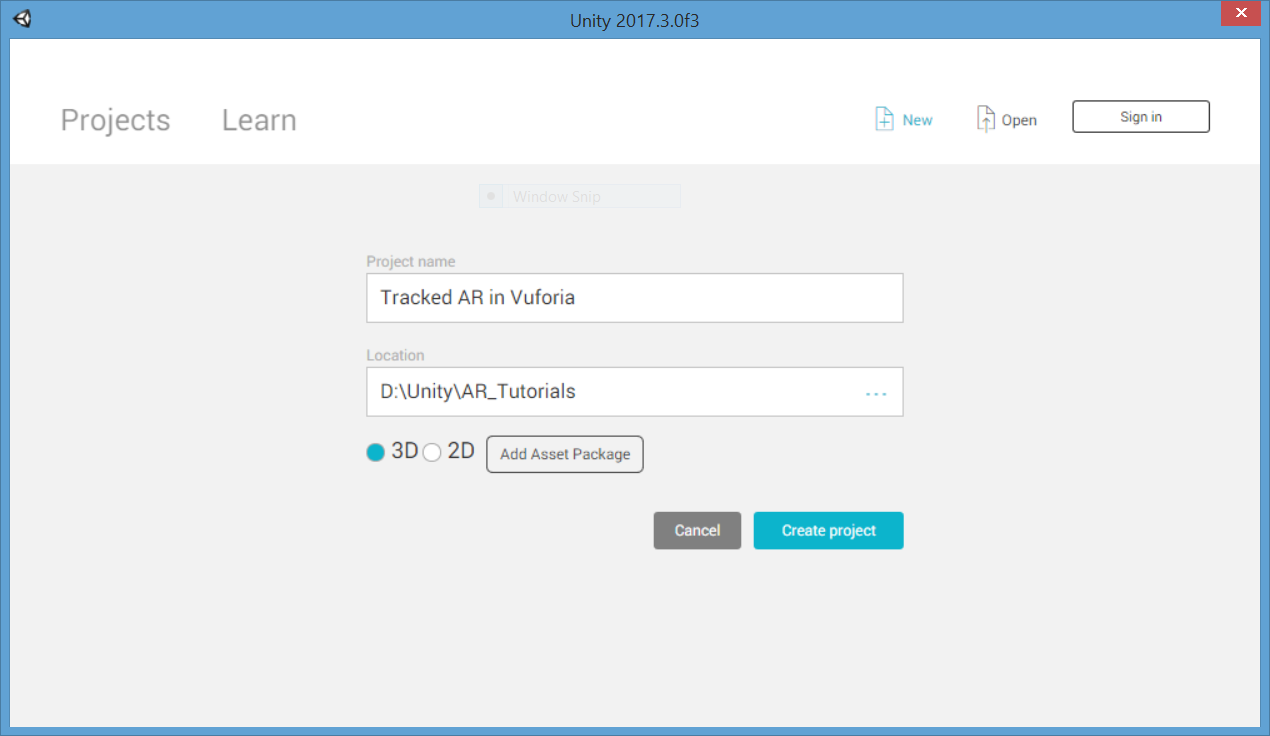
First we need to fire up Unity and Create a new AR project. Make sure its in 3D, and saved somewhere sensible. You can see above that I’m using a 2017 version of Unity, which is important as it has Vuforia support baked in.
2. Set Build Target
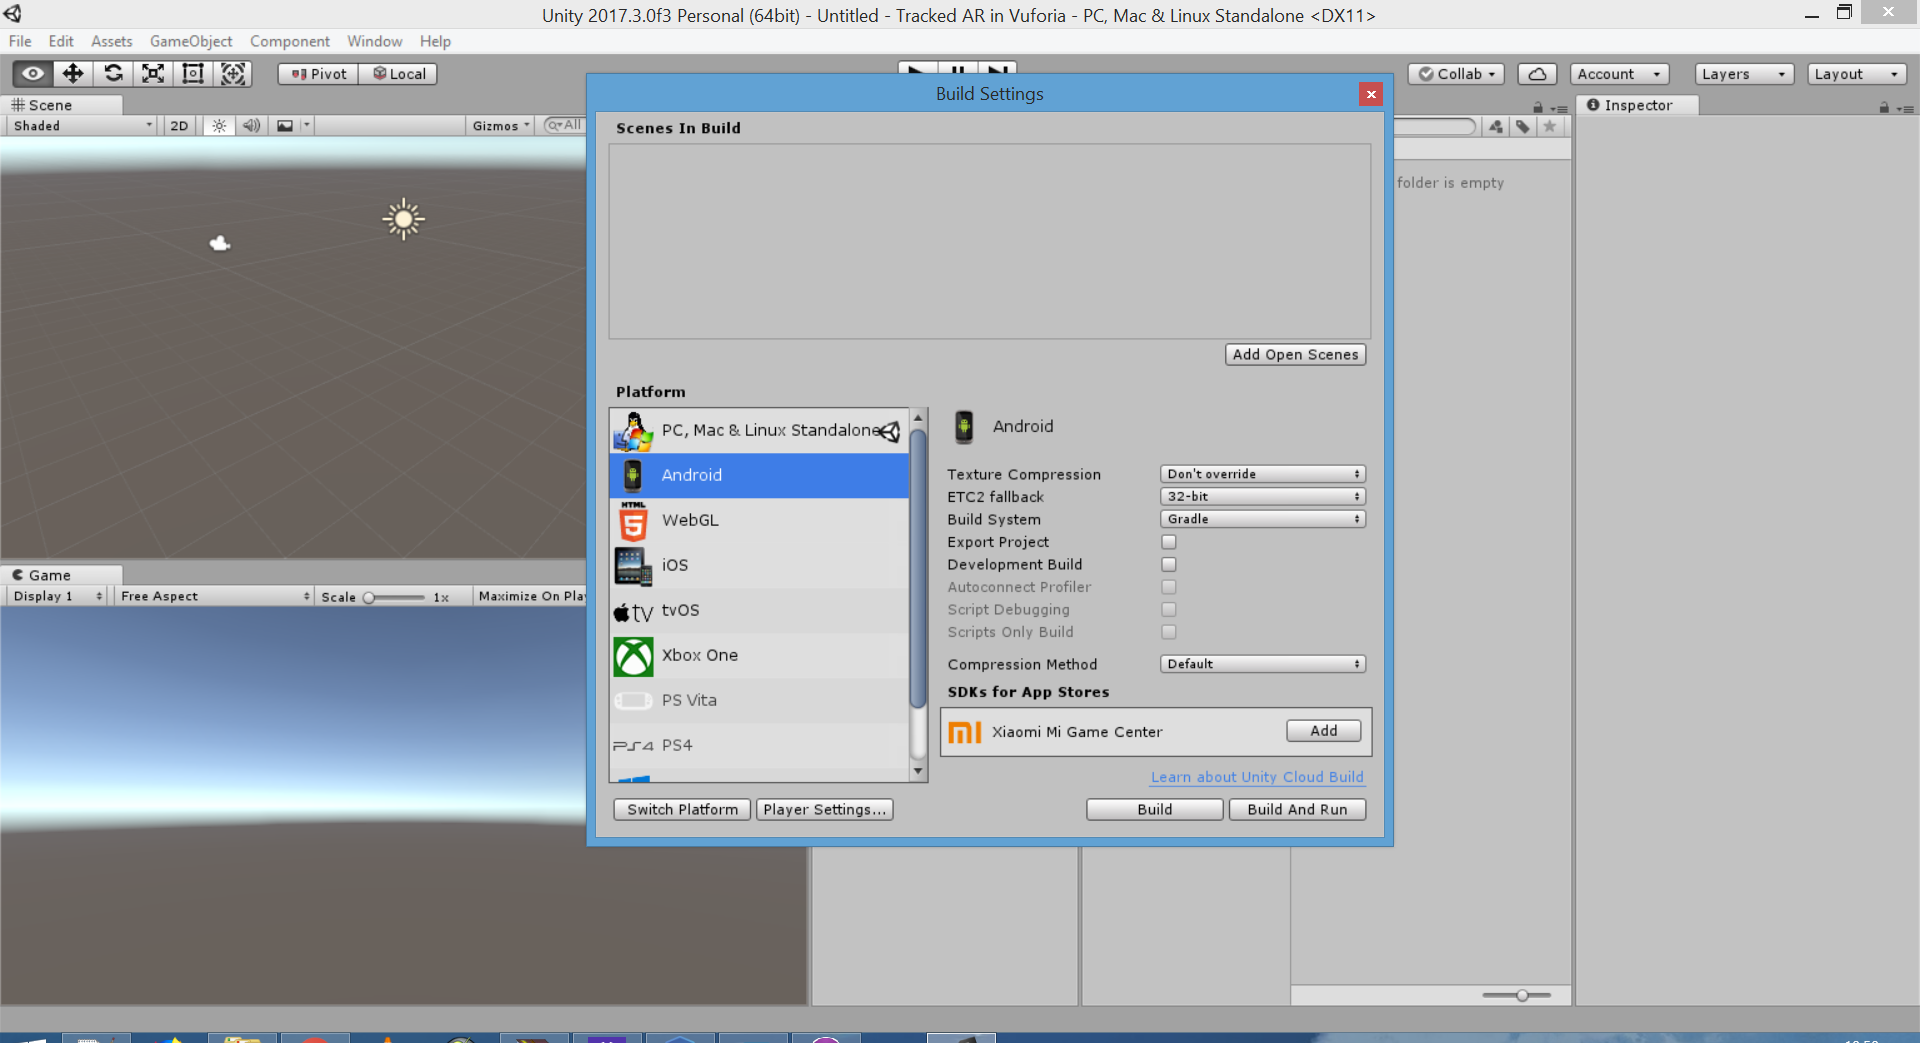
File> Build Settings
Click Android Click Switch Platform
3. Edit the player Settings
From the same menu above, we have to configure our player settings, by clicking on the Player settings button. This will open a side bar in the main unity window. We can close the Build Settings pop-up for now. In this PlayerSettings side bar we need to do two things.
Set the package name
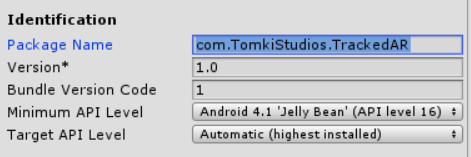
Scroll Down to the Other Settings Heading and under identification we see Package Name.
It defaults to com.Company.ProductName, and will create an error if we do not change this to something more specific, lets say:
com.TomkiStudios.TrackedAR
Set XR settings to enable Vuforia
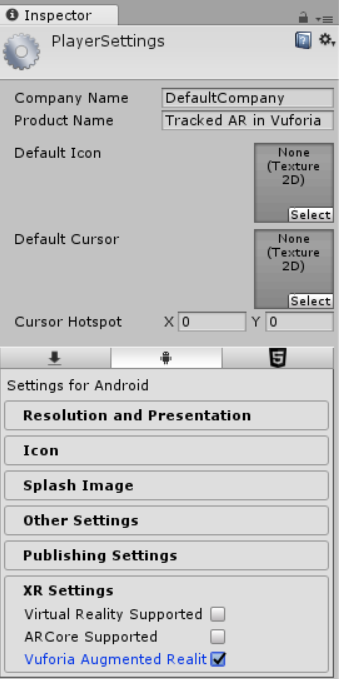
Scroll Down to the XR Settings Heading and we see three settings concerning VR and AR. Tick the Vuforia Augmented Reality checkbox. This will enable the Vuforia integration easily.
So now we’re ready to get into the meat of the AR development.
4. Add the AR Camera
Every project starts with its own camera, but we’re going to have to change that.
Right click on your Heirarchy area, find Vuroria, and Click AR Camera. This will ask you if you are Happy to import some assets, click yes and Vuforia will be imported to your project, and an AR camera Added to your scene.
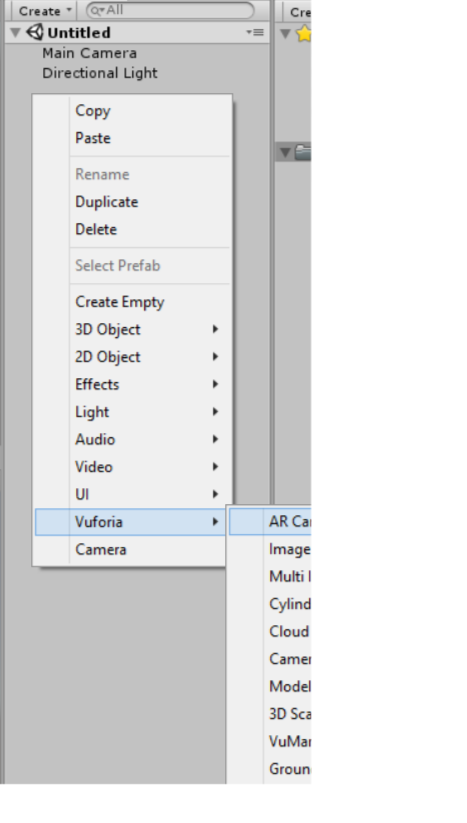
You can now happily remove the original Main Camera, by right clicking and Deleting it.
We should now have an empty scene with only a AR camera and a Directional Lights. Next we need to add the tracker.
5. Add a target Image
Vuforia lets us track any image that we upload, but some are more suitable than others, and we will show how we go about tracking custom images later on. For now, we will use the default image databases.
The image that will be tracked is a specific Vuforia Object, called an ImageTarget. We can easily add one to the scene, by rightclicking the heirarchy again, going to Vuforia>Image.
This will add a ImageTarget object to your scene, and this is where the magic happens.
When your webcam detects the ImageTarget, it will be rendered to your screen, including any objects that are connected to it. So if we wanted a sphere to hover above an image we detect through the camera,we can add it as a child of the ImageTarget.
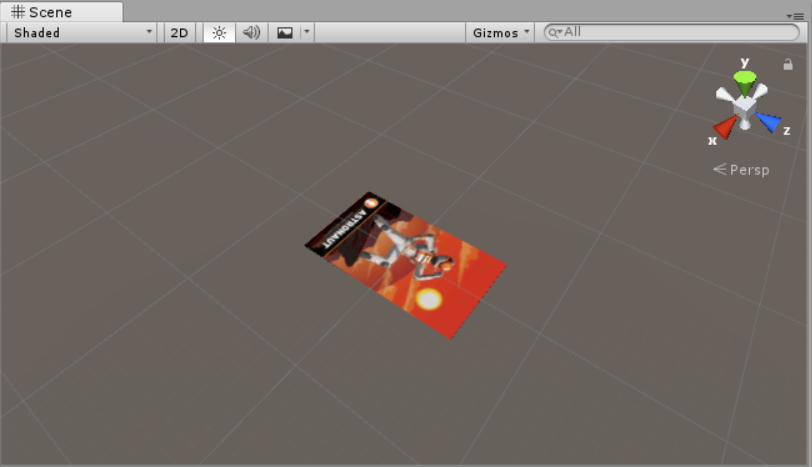
If you find your image in the scene, you will see that the default material is the Vuforia Astronaut. You will need a copy of this image, printed off (or at least on your phone), and you can find it here in Google.
Next we need to tell unity what Vuforia databases (list of images) it will use.
6. Activate Vuforia
Before the AR magic can happen, Vuforia needs you to register for an account, and create a developer key. This is all free for developers who just want to try out AR.
First, we need to pop over to the (Vuforia Developer Portal)[https://developer.vuforia.com/] and register for an account. Once you have done that, and logged in, we will need to get a development key.
You can head to Develop> License Manager and click Get Development Key. This will ask you for a project name, and explain what you can do with the free key.
When you have completed this, you can click on your new project in the Lisence manager, and find the cherished development key, which should look like a long set of gibberish characters.
This is what you will use to enable Vuforia in Unity.
With the Development key, we can activate the Vuforia instance in unity to your project on-line.
Click on the AR Camera, and the Inspector will show you its properties. Press the ‘Open Vuforia Configuration’ button, and paste in your License Key to the App License Key field.
7. Activate the standard Vuforia Databases
Unity comes with the standard set of databases, which includes the astronaut card, so we will go and enable those databases.
In the Vuforia Configuration that was previously opened, tick Load and Activate boxes for each of the Databases.
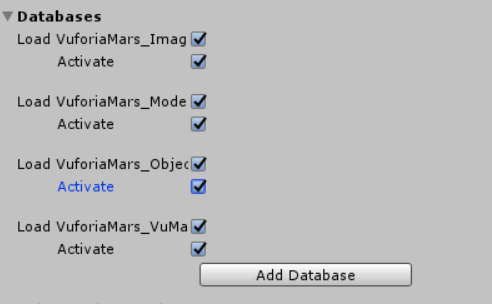
Now, we can close the inspector, and look at the Image Target object.
8. Add a Objects to the target image
The final step to having a functional AR prototype, is to add something to actually display when we detect the image.
We can first try it out with something simple, by adding a sphere to the TargetImage, as a child.
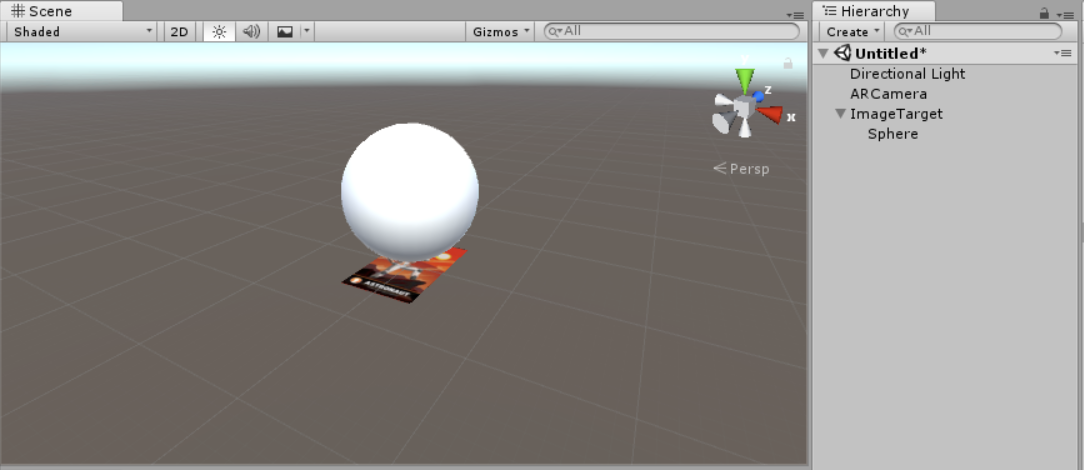
9. Test the AR recognition
That should work, lets test it out by pressing the Play Button, and showing an astronaut to the web-cam.
I have printed a copy off, but you could also open the image on a phone, although the tracking will likely be a lot worse.
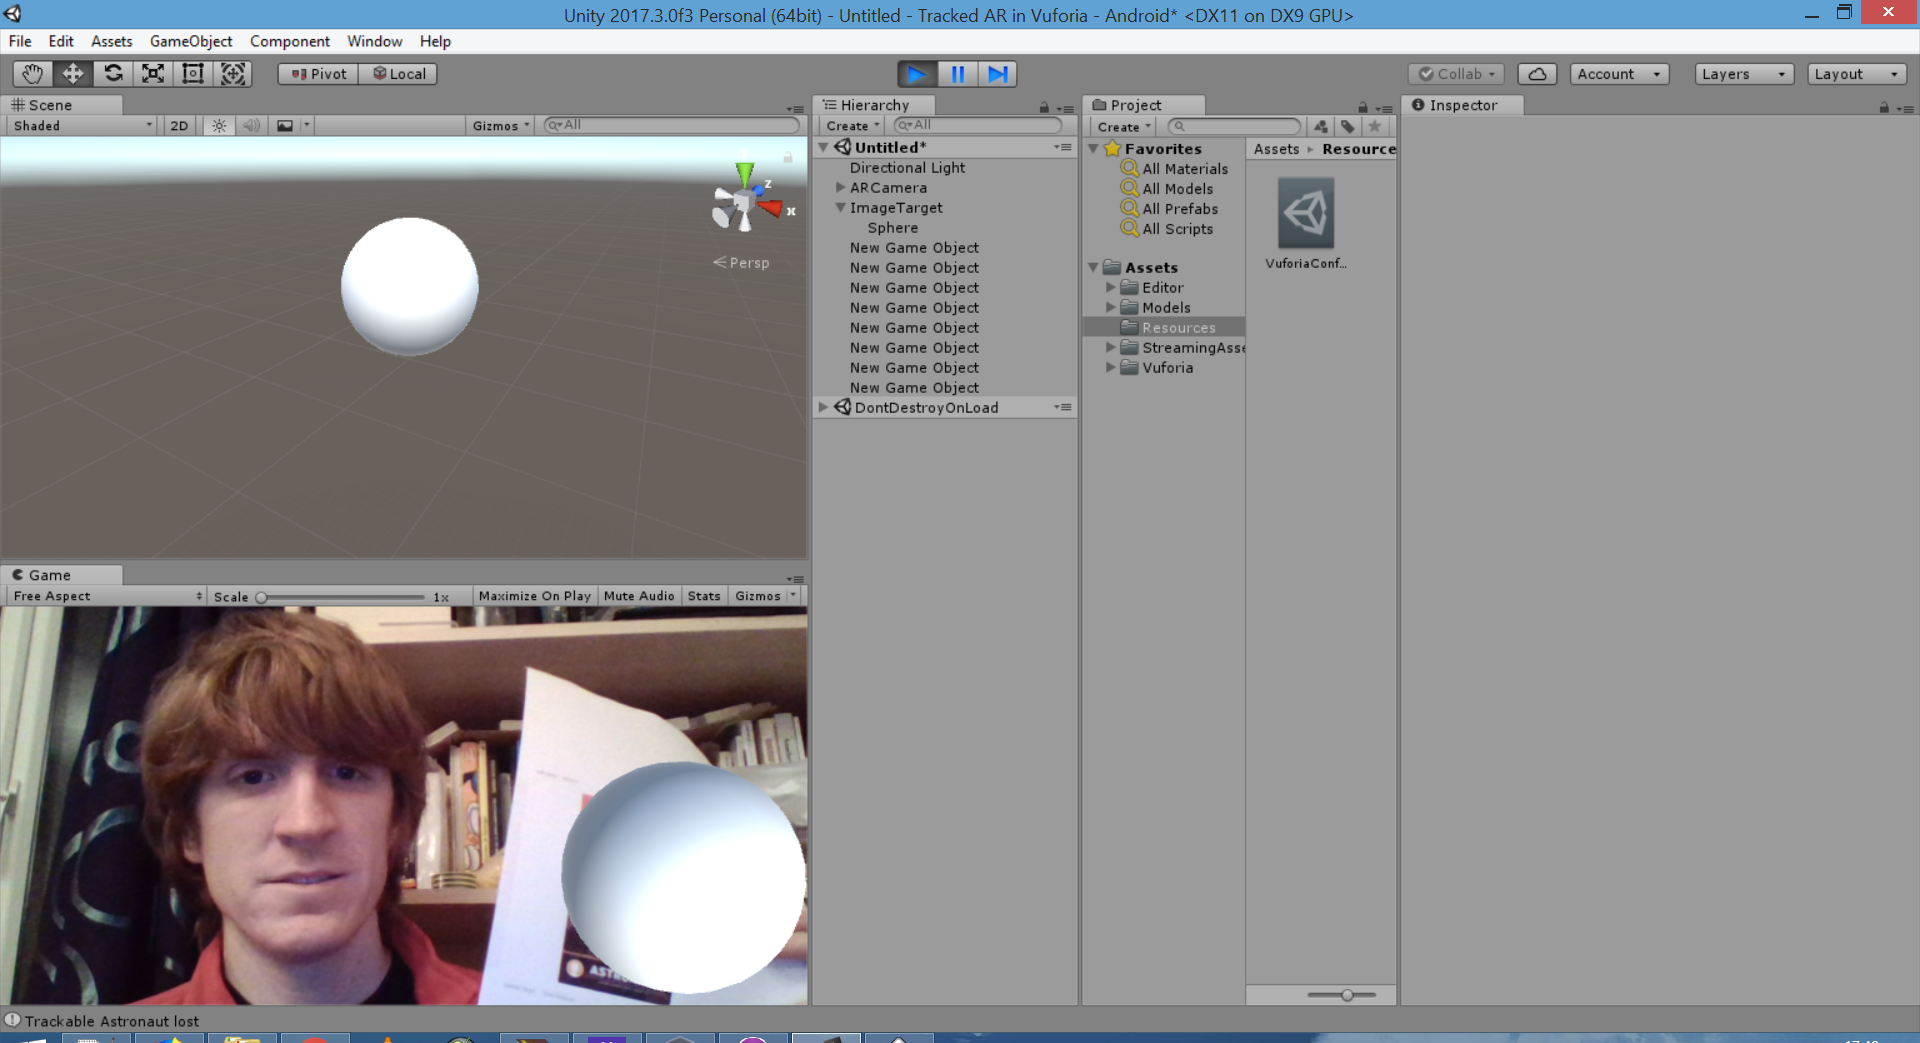
And there you have it, your first AR application. We could go ahead and build it. Now, but it wouldn’t be very interesting. In the next tutorial, we’ll spice it up a bit by using a custom database image, and some animated models.