How to build Android Apps in Unity
Prerequisites:
- A Web Browser
- Unity
- Android Device
Quick Steps:
- Set your Build target
- Set developer Mode on your Device
- Build and Run
A more in depth walk through.
Once you have a Unity application that you’re ready to test out on a device, there isn’t much work required to get running. The most important requirement comes, when you’re installing Unity, to have Android Support enabled.
1. Set your Build target
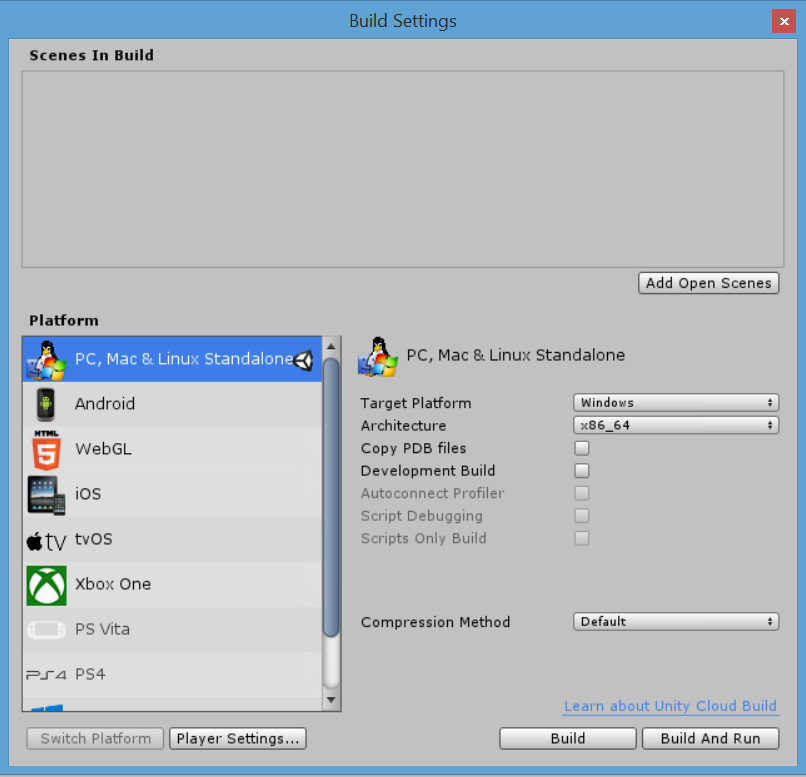
Now that you’re ready to build the app, your first stop is to set your Build Target. This can be done from the File Menu with “File > Build Settings”

You will see the Unity Cubo logo indicating the current build platform, to switch, click on Android and click the switch platform button. It may take a while to recompile your scripts and assets.
2. Set developer Mode on your Device
The Second little trick, is to move your phone into developer mode. This is reasonably easy to do. First, open the settings app on your Android device and scroll down to, and click on, “About phone”.
Find where it says “Build Number” and tap it 7 times. This will push you into developer mode. Deviously hidden, I know.
3. Build and Run
Now, with your device connected to your PC via USB, you can build your app and run it on your phone. Using the “File > Build Settings” click “Build and Run”. This should build your app for the device, and send it across, and attempt to start it running. And that’s it, you’re good to go!
